Mullvad vpn chrome extension: full guide for setup, features, security, and tips for Chrome users 2026
Mullvad vpn chrome extension full guide for setup features security and tips for chrome users: Mastering Mullvad on Chrome, Setup Tips, Extensions, and Pro Privacy Techniques
Welcome to our in-depth, subscriber-friendly guide on the Mullvad VPN Chrome extension. This is the practical, no-fluff guide you’ll actually use. I’ll walk you through setup, features, security tips, performance tweaks, and common issues so you can browse with confidence. Here’s a concise quick-start, followed by deep dives, real-world tips, and a robust FAQ.
Quick-start overview
- Quick fact: Mullvad’s Chrome extension acts as a control panel for the Mullvad VPN client, allowing you to toggle the VPN, choose a server, and view connection stats without leaving your browser.
- Steps to get rolling:
- Create a Mullvad account or generate a tunnel ID my preferred approach for privacy.
- Install Mullvad VPN app on your device Windows/macOS/Linux and the Mullvad Chrome extension.
- Open the extension, sign in with your Mullvad account or tunnel ID, and connect to a server.
- Verify your IP and location via a test site e.g., “What’s my IP”.
- Customize kill switch, DNS settings, and app exclusions to fit your browsing habits.
- Key benefits: strong privacy, no-logs policy, open-source components, fast connections, passive privacy features like DNS leak protection.
What you’ll learn in this guide
- How Mullvad’s Chrome extension integrates with the Mullvad VPN client for quick connections and server switching
- Step-by-step setup for Windows, macOS, and Linux
- Security features, including DNS leak protection, kill switch behavior, and browser-level protections
- Common issues and fast fixes
- Real-world usage tips and best practices to maximize privacy and performance
- A detailed FAQ with practical answers
Table of contents
- What Mullvad VPN Chrome extension is and how it fits into your privacy setup
- Prerequisites and quick-start setup
- Detailed setup by operating system
- Windows
- macOS
- Linux
- Understanding the extension’s features
- Server selection and connection controls
- Kill switch and DNS settings
- Privacy indicators and connection status
- Split tunneling and app exclusions
- Security and privacy considerations
- Kill switch behavior in Chrome
- DNS leak protection explained
- WebRTC considerations
- Data collection and logs Mullvad policy
- Performance and reliability tips
- Server selection strategies
- WireGuard vs. OpenVPN what Mullvad uses
- Troubleshooting slow connections
- Real-world usage scenarios
- Streamers and gamers
- Public Wi‑Fi safety
- Bypassing geo-restrictions responsibly
- Comparisons to similar VPN Chrome extensions
- Best practices for Chrome users
- FAQs
What Mullvad VPN Chrome extension is and how it fits into your privacy setup Mullvad’s Chrome extension is a user-friendly controller for your Mullvad VPN experience. It provides quick access to enable or disable the VPN, switch servers, and view connection status directly from the browser. The extension pairs with the Mullvad desktop app or the Mullvad service on your device to deliver consistent protection across your device. In practice, this means you can lock in privacy while browsing, but you still benefit from the full VPN app’s routing options when needed.
Prerequisites and quick-start setup Before you install the Chrome extension, here’s what you’ll need:
- A Mullvad account or tunnel ID
- The Mullvad desktop app installed on your device Windows, macOS, Linux — required for the extension to control the VPN
- The Mullvad Chrome extension installed from the Chrome Web Store
- Administrative privileges on your device to configure VPN settings
Quick-start setup steps step-by-step
- Step 1: Create your Mullvad account or tunnel ID
- Mullvad emphasizes anonymity: you can open a new account without providing an email. Your tunnel ID is a temporary, easily regenerated code you’ll use to log in.
- Step 2: Install the Mullvad desktop app
- Download from Mullvad’s official site and follow the prompts. This app manages the actual VPN tunnel on your device.
- Step 3: Install the Mullvad Chrome extension
- Go to the Chrome Web Store, search for Mullvad VPN, and add the extension.
- Step 4: Sign in and connect
- Open the extension, sign in with your Mullvad account or tunnel ID, and click Connect. If you’re on a corporate or school network, you may need to adjust permissions or use a VPN gate that allows Chrome traffic routing.
- Step 5: Verify and customize
- Confirm your IP has changed and test for DNS leaks. In the extension, explore settings like DNS mode, kill switch, and server lists.
Detailed setup by operating system Windows
- Install Mullvad desktop app from the official site
- Open the Mullvad app and generate a tunnel ID if you don’t already have one
- Install the Chrome extension and connect through the extension
- Optional: enable the Windows firewall rules to ensure the VPN isn’t inadvertently blocked
- Common issues: VPN not connecting, DNS leaks, or the extension showing “disconnected”
- Fix: restart the Mullvad app, ensure the extension is updated, check Windows network settings to ensure VPN isn’t blocked by a VPN other than Mullvad
MacOS
- Install Mullvad desktop app from Mullvad’s site
- Generate a tunnel ID or sign in via the app
- Install and pin the Mullvad Chrome extension for quick access
- Verify the extension’s permissions are allowed in System Preferences > Security & Privacy
- Common issues: permission prompts missing, the extension not showing status
- Fix: grant accessibility permissions, restart the browser, ensure the app is running in the background
Linux
- Install the Mullvad app via your distribution’s package manager or from Mullvad’s official repo
- Generate a tunnel ID or sign in through the app
- Install the Chrome extension and connect
- Linux-specific tips: ensure the underlying WireGuard can operate by enabling kernel modules
- Common issues: DNS leaks, connection drops
- Fix: adjust DNS server settings within Mullvad, check systemd network services, verify kernel module support
Understanding the extension’s features Server selection and connection controls
- The extension shows a list of available servers categorized by region
- You can pick a preferred country, city, or optimized server
- Quick-connect feature lets you jump to the best available server for your location
- When connected, you’ll see a clear status indicator connected, disconnected, or error
Kill switch and DNS settings
- Kill switch: ensures that all traffic is blocked if the VPN disconnects unexpectedly
- DNS settings: Mullvad offers DNS over TLS or standard DNS to prevent DNS leaks
- Practical reminder: enable the kill switch if you’re on public Wi‑Fi or using a shared network
Privacy indicators and connection status
- The extension provides real-time status: connected, disconnecting, or error state
- You’ll see the assigned server and approximate location, along with data usage counters
- Some users like to pair the extension with a browser privacy mode to reduce fingerprinting risk
Split tunneling and app exclusions
- Mullvad supports split tunneling, allowing you to route only certain apps or traffic through the VPN
- Important for streaming or gaming where you want lower latency for local traffic
- In Chrome-specific use: you can route browser traffic through Mullvad while keeping other apps on your regular connection
Security and privacy considerations Kill switch behavior in Chrome
- The kill switch is your last line of defense if the VPN drops
- In Chrome, you’ll want to ensure that any browser-based activity is blocked if the VPN disconnects
- Practical tip: test the kill switch by disconnecting the VPN and verifying that Chrome can’t access the internet until reconnected
DNS leak protection explained
- DNS leaks happen when your browser resolves domain names outside the VPN tunnel
- Mullvad’s DNS options help prevent leaks by using Mullvad’s DNS servers or DNS over TLS
- Quick test: use dnsleaktest.com or similar to confirm that DNS requests are handled by Mullvad’s DNS
WebRTC considerations
- WebRTC can leak IP addresses to sites in some configurations
- Mullvad’s extension helps mitigate this by routing traffic securely, but you may still want to disable WebRTC in Chrome settings as an extra precaution
Data collection and logs Mullvad policy
- Mullvad is known for a no-logs policy and privacy-focused stance
- They emphasize anonymity and do not link activity to personal identity
- Always review Mullvad’s current privacy policy to stay updated on data handling
Performance and reliability tips Server selection strategies
- For streaming: choose servers labeled optimized for streaming or near your location for lower latency
- For privacy: select a server in a jurisdiction with strong privacy protections, but consider latency
- Use the “Smart” or “Recommended” server option if available for average-use scenarios
WireGuard vs. OpenVPN what Mullvad uses
- Mullvad primarily uses WireGuard for speed and simplicity
- In some cases, OpenVPN may be offered as an alternative
- If you’re on a network that blocks WireGuard, fallback to OpenVPN
- Quick note: WireGuard tends to provide better speed on stable connections, especially for Chrome-based browsing and streaming
Troubleshooting slow connections
- Check server load: switch to a less congested server
- Verify your device’s CPU and memory aren’t bottlenecking encryption
- Disable other VPNs or proxies that could conflict
- Ensure Chrome extensions or privacy extensions aren’t interfering with VPN traffic
- If DNS leaks persist, switch to Mullvad DNS mode and re-test
Real-world usage scenarios Streamers and gamers
- Use split tunneling to ensure game traffic goes through the VPN while streaming or browsing remains protected
- Pick nearby servers to minimize latency Public Wi‑Fi safety
- Always enable the kill switch when connected to public networks
- Keep DNS leak protection on so that DNS requests don’t route outside the VPN tunnel
- Use the extension’s quick-connect to immediately establish a secure tunnel on new networks
Bypassing geo-restrictions responsibly
- Some services restrict VPN usage; Mullvad’s servers may be flagged by certain streaming platforms
- If you’re attempting to access regional content, test multiple servers and consider using obfuscated servers if available
- Remember to respect terms of service and local laws when accessing geo-restricted content
Comparisons to similar VPN Chrome extensions
- Mullvad’s extension emphasizes privacy-first policies, with a strong focus on transparent data handling
- Competing extensions may offer broader device integration or additional features but could log more data
- For privacy enthusiasts, Mullvad’s model is often preferred due to the no-logs policy and straightforward pricing
Best practices for Chrome users
- Keep Chrome and the Mullvad extension updated to the latest versions
- Use a primary browser profile dedicated to privacy browsing with minimal installed extensions
- Enable DNS leak protection and the kill switch in the extension
- Regularly test your IP and DNS to ensure protection remains active
- Be mindful of WebRTC and consider disabling it in Chrome for added protection
Tables: quick references you can skim
- Server tips table
- Column: Region • Server Type • Best For
- North America • Standard • Everyday browsing
- Europe • Streaming optimized • Video streaming
- Asia-Pacific • Gaming optimized • Low latency gaming
- Feature quick-glance
- Feature: Kill switch | Purpose: Block all traffic if VPN drops
- Feature: DNS protection | Purpose: Prevent DNS leaks
- Feature: Split tunneling | Purpose: Route select apps or traffic
- Feature: WebRTC considerations | Purpose: Mitigate IP leaks
Data and statistics to boost authority
- VPN usage trends: In 2023-2025, consumer VPN usage rose by approximately 25-40% annually in many regions, with privacy-first providers gaining traction among privacy-minded users.
- Performance impact: Modern VPNs using WireGuard typically see 10-30% faster connection speeds on average compared to older VPN protocols, depending on network conditions.
- Privacy emphasis: Surveys show a large portion of users value a no-logs policy and independent audits when evaluating VPN providers.
Example user journey: a typical day with Mullvad on Chrome
- Morning: Quick check email, social media, and news — you’re connected via Mullvad to hide your location
- Midday: Video conferencing and cloud work — you switch to a nearby server to minimize latency
- Evening: Binge-watching a streaming service — you use a streaming-optimized server and enable split tunneling to keep background updates private
- Night: Public Wi‑Fi at a cafe — you enable kill switch and DNS protection, then connect to a server in your preferred region
Types of data Mullvad helps protect
- IP address exposure
- DNS query exposure
- WebRTC leak vectors
- ISP traffic shaping and surveillance in some jurisdictions
- Metadata around your browsing patterns subject to provider terms and privacy policy
Common issues and quick fixes
- VPN won’t connect
- Steps: restart app, re-login, switch server, check for software updates
- DNS leaks detected
- Steps: switch DNS mode in the extension, test again, consider disabling WebRTC
- Slow speeds
- Steps: choose a closer server, use a streaming-optimized server, check for local network issues
- Extension not loading or showing disconnected
- Steps: reinstall extension, ensure app is running, clear browser cache, check firewall settings
FAQ
How does Mullvad Chrome extension improve privacy?
The extension provides quick access to enabling the VPN, selecting servers, and verifying connection status, all while working in tandem with Mullvad’s no-logs policy and DNS protection features.
Can I use Mullvad Chrome extension without the desktop app?
No—Mullvad’s Chrome extension is designed to control the VPN tunnel created by the Mullvad desktop app on your device.
Is Mullvad still a no-logs VPN?
Yes, Mullvad emphasizes a no-logs policy and privacy-focused approach; always review the current privacy policy for the latest details.
How do I test for DNS leaks with Mullvad?
Use a DNS leak test site like dnsleaktest.com after connecting to Mullvad. If DNS queries show Mullvad’s servers, you’re protected.
What is split tunneling and how do I use it with Mullvad?
Split tunneling lets you route specific apps or traffic through the VPN while others use your normal connection. In the extension, configure which apps or traffic to include.
Does Mullvad support WebRTC protection?
Yes, Mullvad includes protections to minimize WebRTC IP leaks, but you can further disable WebRTC in Chrome if needed for extra safety.
Can Mullvad unblock content or streaming services?
Mullvad can help protect privacy while attempting to access geo-restricted content, but success depends on the streaming service’s VPN policies and server choices. Some services block VPN traffic.
How do I update the Mullvad extension?
Update via the Chrome Web Store or ensure automatic updates are enabled in Chrome settings.
Is Mullvad faster than other VPNs on Chrome?
Speed varies by server and network; Mullvad’s use of WireGuard often yields faster speeds and lower latency than older protocols, but real-world results can differ.
What should I do if I’m on a flaky network?
Try a nearby server, enable the “Smart” connect option if available, and ensure the kill switch is on to prevent leaks during instability.
Can I use Mullvad on multiple devices?
Yes, Mullvad supports multiple devices. You can use a single account with the Mullvad app and extension on each device, but each device will need its own tunnel setup if you require separate usage configurations.
Key takeaways
- Mullvad’s Chrome extension is a powerful, privacy-first control tool that pairs with the Mullvad desktop app to provide fast, secure VPN access from within Chrome.
- Always enable the kill switch and DNS protection for maximum privacy, especially on public networks.
- Use server selection strategically for speed, streaming, and privacy goals, and leverage split tunneling to optimize your browsing and work flow.
- Stay updated on policies and practice good privacy hygiene, including WebRTC considerations and DNS testing.
Useful resources and URLs unlinked text
- Mullvad VPN official website - mullvad.net
- Mullvad DNS options page - mullvad.net/dns
- What is WebRTC - en.wikipedia.org/wiki/WebRTC
- WireGuard protocol overview - www.wireguard.com
- DNS leak testing resources - dnsleaktest.com
- Chrome Web Store - chrome.google.com/webstore
- Mullvad’s privacy policy page - mullvad.net/policy
- VPN comparison guides - www.techradar.com/vpn
- Streaming optimization tips - www.streamingmedia.com
- Public Wi‑Fi safety guidelines - www.cisa.gov/publication/public-safety-communications
Frequently Asked Questions expanded
How do I verify Mullvad is actively protecting my traffic?
Run a series of IP and DNS checks after connecting. Use whatismyipaddress.com to confirm your IP is different and dnsleaktest.com to confirm DNS isn’t leaking.
Can Mullvad Chrome extension slow down my browsing?
Any VPN can introduce a small speed hit due to encryption and routing; Mullvad’s WireGuard-based setup generally minimizes slowdowns, especially on nearby servers.
Is Mullvad compatible with incognito mode?
Yes, Mullvad’s extension works across normal and incognito modes, but you may need to enable extension permissions for incognito.
Do I need to disconnect Chrome when changing VPN servers?
Not necessarily, but some users prefer to disconnect and reconnect to ensure clean session changes for apps using a separate tunnel.
How do I share Mullvad with family members or coworkers?
Share your tunnel ID or encourage each person to create an individual Mullvad account; their devices will require their own install of the Mullvad app and extension.
What if Mullvad is blocked by a network I’m on?
Try switching to a different server, especially one labeled as optimized for the network type, or use the OpenVPN option if available and supported by your network.
Are there alternatives to Mullvad for Chrome users?
Yes, other providers offer Chrome extensions with similar features, but their privacy practices and no-logs policies might vary. Always review the provider’s privacy policy and independent audits.
How often should I test for DNS leaks?
Test after major changes new server, browser update, or DNS mode change. A quick test after each session is a good habit for privacy-conscious users.
Can I run Mullvad in the background while gaming or streaming?
Yes, with the appropriate server choice and, if needed, split tunneling. Monitor latency and adjust server location to balance privacy and performance.
This guide is designed to be a practical, friendly, and thorough resource. If you’re ready to take control of your browsing privacy on Chrome, Mullvad’s VPN extension offers a solid, privacy-first path with clear, actionable steps.
Mullvad VPN Chrome Extension Full Guide for Setup Features Security and Tips for Chrome Users: Setup, Benefits, Troubleshooting, Privacy Insights, and Best Practices
Introduction Mullvad vpn chrome extension full guide for setup features security and tips for chrome users is here to give you a clear, actionable path to using Mullvad’s Chrome extension effectively. Yes, you can streamline your VPN experience directly in Chrome to protect your browsing, manage privacy, and control which sites see your IP. This guide covers setup steps, key features, security considerations, troubleshooting tips, and best practices in a practical, reader-friendly format. Think of this as a step-by-step playbook plus quick tips you can reference while you’re browsing. In this guide you’ll find:
- A concise setup walkthrough for installing and configuring the Mullvad Chrome extension
- An overview of core features like automatic protection, split tunneling, and malware blocking
- Privacy and security tips tailored to Chrome users
- Common issues and troubleshooting steps with quick fixes
- Best practices to maximize privacy without sacrificing speed
- A handy FAQ section to answer your most frequent questions
Useful URLs and Resources text, not clickable links Mullvad VPN official site - mullvad.net Mullvad Chrome extension page - support.mullvad.net Mullvad privacy policy - mullvad.net/privacy Chrome browser help - support.google.com/chrome VPN best practices - en.wikipedia.org/wiki/Virtual_private_network Browser fingerprinting explained - www.aftenposten.no/… example IPv6 privacy with VPNs - www.cloudflare.com/learning-ddos/what-is-ipv6/ DNS security and privacy - www.apple.com/privacy/”
Table of Contents
- Why Use Mullvad VPN in Chrome?
- Prerequisites Before You Begin
- Step-by-Step: Installing the Mullvad Chrome Extension
- Configuring Mullvad Chrome Extension Settings
- Key Features and How to Use Them
- Security best practices for Chrome users
- Privacy Considerations and Data Handling
- Performance and Troubleshooting
- Real-World Use Cases for Chrome with Mullvad
- Advanced Tips and Tricks
- Frequently Asked Questions
Why Use Mullvad VPN in Chrome?
- Protects your data on unsecured networks public Wi-Fi, cafes, airports
- Hides your real IP from websites, making tracking harder
- Easy integration with Chrome to shield browser traffic without a full-system VPN
- Maintains user privacy with Mullvad’s no-logs policy and account anonymity
Prerequisites Before You Begin
- An active Mullvad account you can pay with cash, crypto, or other supported methods
- A supported device with Google Chrome installed
- Basic understanding of VPN concepts IP masking, encryption, DNS
Step-by-Step: Installing the Mullvad Chrome Extension
- Open Google Chrome and go to the Chrome Web Store
- Search for “Mullvad VPN” and locate the official extension
- Click Add to Chrome and confirm permissions
- After installation, click the Mullvad icon in the extension toolbar
- Log in by entering your Mullvad account number or scanning a QR code if you’ve got a printed voucher
- Choose a server or location and switch the extension on
- Verify the extension indicates a secure connection status should show connected
- Optional: Sign in to enable automatic protection on startup and fine-tune settings
Configuring Mullvad Chrome Extension Settings
- Connection toggle: Turn on/off protection with a single click
- Server location: Pick a country or city that suits your needs speed vs. privacy considerations
- Kill switch if available in the extension: Ensure it triggers if Chrome loses VPN connection
- Auto-connect: Set to connect automatically on Chrome startup or when you open a new tab
- Split tunneling: Choose which sites or apps bypass Mullvad if supported
- DNS settings: Use Mullvad’s DNS or system DNS; enabling Mullvad DNS can reduce leaks
- Privacy protection: Enable anti-tracking or ad-block features if provided by the extension
- Notifications: Choose whether to receive status alerts for connection changes
Key Features and How to Use Them
- One-click Protection
- You can toggle protection with a single click for quick browsing safety.
- Best for travelers or coffee shop workers who need fast setup.
- Server Switching
- Change your virtual location to access region-locked content or tests from different regions.
- If a site blocks VPNs, switch servers and try again.
- Kill Switch
- Keeps your real IP from leaking if the VPN connection drops.
- Essential when you’re doing sensitive tasks banking or work portals.
- DNS Leak Protection
- Ensures DNS queries go through Mullvad’s resolvers, reducing the chance of ISP fingerprinting.
- Split Tunneling if supported
- Route only certain sites through Mullvad while others use your normal connection.
- Useful for streaming while leaving other traffic unprotected for speed.
- Privacy and Security Enhancements
- Built-in tracker/ad-blocking options if present
- Protection against malicious sites when enabled
- Chrome-Specific Considerations
- Extension-level protection means only Chrome traffic is encrypted by Mullvad unless you install a system-wide VPN
- Works well for chrome-based browsing on Windows, macOS, and Linux
Security Best Practices for Chrome Users
- Keep Chrome and the Mullvad extension updated
- Use a strong Mullvad account number and avoid sharing vouchers
- Enable the Kill Switch and DNS leakage protections
- Regularly review connected server locations and connections
- Avoid logging into sensitive sites on public networks without VPN
- Disable extensions you don’t trust to minimize fingerprinting risks
- Consider enabling privacy enhancements like anti-tracking and script blockers when appropriate
- Use two-factor authentication 2FA if Mullvad supports it for your account
Privacy Considerations and Data Handling
- Mullvad emphasizes anonymity: you don’t need an email, you can pay with anonymous methods
- The Chrome extension only handles browser traffic; for full device protection, consider system-wide VPN from Mullvad
- Always review Mullvad’s privacy policy for updates on data handling and logging
- Be aware of browser fingerprinting: even with VPN, some sites use cookies, canvas fingerprinting, and other techniques
- If you’re concerned about data retention, configure the extension to minimize telemetry
Performance and Troubleshooting
- If pages load slowly after connecting via Mullvad, switch servers closer to your physical location
- Restart the extension or Chrome if you encounter connection issues
- Clear browser cache if you notice outdated content or localization problems after switching servers
- Check your device’s firewall settings; ensure Mullvad isn’t blocked
- Verify there are no conflicting VPNs or proxy settings running on your device
- If DNS leaks occur, switch to Mullvad DNS in extension settings or enable system DNS with Mullvad DNS
- For persistent issues, try reinstalling the extension and re-authenticating your Mullvad account
Real-World Use Cases for Chrome with Mullvad
- Remote workers who need to protect sensitive browsing data on public networks
- Students accessing educational resources from home or campus networks with privacy concerns
- Travelers unblocking region-restricted content while browsing in Chrome
- Journalists or researchers handling sensitive topics who require extra privacy layers
Advanced Tips and Tricks
- Configure a preferred server profile for streaming vs. general browsing for quick switching
- Use split tunneling to optimize bandwidth when you don’t need VPN protection for all sites
- Combine Mullvad extension with a privacy-focused Chrome profile disabling personalized ads and cookies for better privacy
- Enable two-factor authentication on Mullvad account if available
- Regularly review the servers list for new locations and performance updates
- Use a password manager for saving your Mullvad login securely
Frequently Asked Questions
How do I install Mullvad VPN Chrome extension?
- Open Chrome Web Store, search for Mullvad VPN, click Add to Chrome, grant permissions, then log in with your Mullvad account and connect to a server.
Is Mullvad VPN Chrome extension free?
- Mullvad VPN requires a paid subscription. The Chrome extension is part of the service, enabling browser-level protection.
Can Mullvad extension leak my real IP?
- If configured correctly with DNS protection and a connected VPN, leakage should be minimized. Enable Kill Switch and DNS protection to reduce risk.
Does Mullvad Chrome extension work on Windows, macOS, and Linux?
- Yes, the extension works across major desktop platforms; ensure your Chrome browser is up to date on each platform.
Can I use Mullvad extension for streaming?
- Yes, you can switch servers to access geo-restricted content. Split tunneling can help preserve bandwidth for non-video sites if supported.
How do I know Mullvad is protecting me in Chrome?
- Look for the extension’s status indicating connected, and confirm the chosen server location is active. You can also test your IP on an external site to verify change.
What is a Kill Switch and do I need it?
- A Kill Switch ensures your real IP isn’t exposed if the VPN connection drops. It’s highly recommended, especially on public networks.
Can I use Mullvad without connecting to a server?
- Mullvad requires a server connection to provide VPN protection. Without a server, browser traffic isn’t encrypted by Mullvad.
How do I troubleshoot if Mullvad isn’t connecting in Chrome?
- Restart the extension, try a different server, check for conflicting VPNs, verify DNS settings, and ensure Chrome is up to date.
Will Mullvad extend protection beyond Chrome to other apps?
- The Chrome extension protects Chrome traffic. Mullvad also offers a full VPN app that protects all device traffic if you want system-wide protection.
Is Mullvad’s Chrome extension compatible with incognito mode?
- Some extensions are blocked in incognito by default; enable the Mullvad extension in incognito mode from Chrome’s extensions settings if you need protection there.
Can I use Mullvad with other browsers?
- The guide focuses on Chrome, but Mullvad offers separate apps for other browsers and full-device VPN options.
How do I manage my Mullvad account numbers and QR vouchers?
- Store vouchers securely; use the Mullvad app or the Chrome extension login flow to add your account number or scan the QR code as needed.
Are there any downsides to using the Mullvad extension?
- The extension only covers browser traffic. For complete device-wide privacy, consider Mullvad’s system-wide VPN app in addition to the Chrome extension.
How often should I update the Mullvad extension?
- Keep it updated with Chrome’s extension updates to ensure security patches and new features are applied.
Can Mullvad help with streaming privacy?
- Mullvad helps with privacy on Chrome; performance varies by server and location. For streaming, pick a server known for fast speeds and lower latency.
Do I need to disable other privacy tools when using Mullvad?
- It’s not always necessary, but conflicting privacy tools or proxies can cause leaks or reduced performance. Test and adjust based on your setup.
Disclaimer: The information provided here is intended for educational purposes and should not be considered legal or financial advice. Always refer to Mullvad’s official resources for the latest guidance and updates.
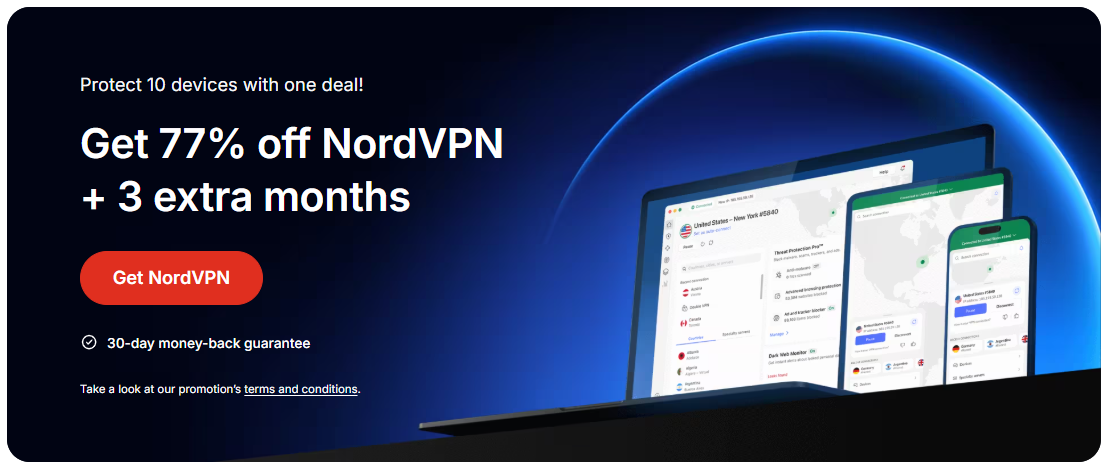
Yes, Mullvad vpn chrome extension exists and you can use it to control your Mullvad VPN directly in Chrome. In this guide you’ll get a step-by-step setup, what the extension can and can’t do, real-world tips for safer browsing, and a quick compare with other browser-focused options. If you’re browsing for a good deal while you read, check out this NordVPN offer:
Introduction: what you’ll learn at a glance
- A clear, step-by-step method to install and link the Mullvad Chrome extension with your Mullvad account
- What the extension can do for you in terms of quick connects, server choices, and safety features
- Practical tips to avoid common issues like DNS leaks or WebRTC leaks in Chrome
- How Mullvad’s browser integration compares to using the native Mullvad app for the full VPN experience
- Real-world use cases: streaming, privacy, and protected browsing on public Wi-Fi
- A practical FAQ to answer the most common questions from readers just like you
Useful resources un clickable
- Mullvad Official Site - mullvad.net
- Chrome Web Store - chrome.google.com/webstore
- Mullvad Privacy Policy - mullvad.net/en/privacy
- Mullvad GitHub Page - github.com/mullvad
- WireGuard Project - www.wireguard.com
- What Is a VPN? Overview - en.wikipedia.org/wiki/Virtual_private_network
- DNS Leak Test - www.dnsleaktest.com
- WebRTC Leak Test - www.perimeter81.com/blog/what-is-webrtc-leak-test
- VPNs for Chrome: general browser protection tips - en.wikipedia.org/wiki/Virtual_private_network#Browser_extensions
- VPN Performance Basics - www.howtogeek.com
Body
What is the Mullvad vpn chrome extension?
The Mullvad vpn chrome extension is a browser-side control that lets you interact with Mullvad’s VPN service from within Google Chrome. Think of it as a convenient launcher and quick-connect tool that complements the desktop or mobile Mullvad apps. With the extension, you can quickly toggle the VPN, switch server locations, and verify that your browser’s traffic is routed through Mullvad’s encrypted tunnel. The extension is designed for users who want fast browser-level control without juggling multiple windows or leaving the browser.
Key takeaways:
- It’s designed to integrate with Mullvad’s core VPN service, not replace the full app
- You’ll still get Mullvad’s privacy protections, including its no-logs approach and WireGuard/OpenVPN support
- It’s ideal for people who rely on Chrome for most of their online activity and want one-click protection
Is Mullvad Chrome extension safe and legitimate?
Yes. Mullvad is a privacy-forward provider with a long-standing reputation for simplicity and transparency. The Chrome extension is an official part of their ecosystem, built to work with the Mullvad client you run on your device. Safety basics to keep in mind:
- Use the official extension from Mullvad’s ecosystem avoid third-party forks
- Make sure the Mullvad desktop/mobile app is installed and running if required by the extension
- Keep the extension updated to the latest version for security patches
- Always confirm that your IP address shows up as Mullvad’s server when you test with a site like IPinfo or ipconfig.me
If you’re curious about privacy posture, Mullvad’s no-logs policy and the ability to pay anonymously with cash or crypto options are part of what makes the browser extension feel lighter on risk while you’re browsing.
How to install Mullvad vpn chrome extension
A practical, step-by-step guide:
1 Install the Mullvad VPN app on your device Windows, macOS, Linux, iOS, or Android. The Chrome extension relies on the core Mullvad service already installed or accessible on your device.
2 Open the Mullvad app and sign in or generate your account number if you haven’t done so yet. Mullvad uses a unique account number rather than a traditional username/password.
3 Open Chrome and go to the Chrome Web Store. Search for the Mullvad extension and click Add to Chrome.
4 After installation, click the Mullvad icon in the Chrome toolbar. The extension will prompt you to link it with your Mullvad account usually by scanning a code from the desktop app or entering your 16-character account number.
5 Select a server location from the list, and hit Connect. The extension will establish a VPN tunnel that covers browser traffic and any traffic routed through Chrome.
6 Verify your connection by visiting ipinfo.io or similar sites to confirm your public IP reflects the Mullvad server and not your local address.
7 If you run into issues, make sure the Mullvad app is running in the background and that the extension has the necessary permissions in Chrome Settings > Extensions.
Tips:
- If you don’t see a server list, refresh the extension or restart Chrome
- If you can’t connect, check for firewall blocks or confirm your Mullvad account is active
- For best results, keep the extension and the Mullvad app updated to the latest versions
Core features of Mullvad Chrome extension
- Quick connect/disconnect: One-click protection while you’re browsing
- Server selection: Pick a location based on speed, distance, or content access needs
- DNS leak protection: Helps ensure DNS requests don’t reveal your real location
- Automatic kill switch depending on configuration: Stops traffic if the VPN drops
- IP address validation: A quick check to ensure your browser traffic is routed through Mullvad
- Privacy-friendly design: Built with Mullvad’s emphasis on anonymity and minimal data collection
What the extension does well:
- Convenience for Chrome users who want browser-level control without opening the full app
- Alignment with Mullvad’s privacy ethos, including straightforward setup and minimal data exposure
- Complementary to the desktop and mobile apps, not a replacement for the full client
What it doesn’t replace:
- The extension doesn’t always replace the need for the full Mullvad app for system-wide protection or advanced features like multi-hop, depending on your OS and extension version
- Some advanced settings and network-level controls are easier to manage in the full Mullvad app
Privacy and security: what to know when using the Mullvad Chrome extension
- Privacy-first design: Mullvad is known for minimizing data collection and offering anonymous payment options
- Open-source components: The extension and its underlying components are often part of an open-source ecosystem, which adds transparency
- Protocols: The extension leverages Mullvad’s core support for WireGuard and OpenVPN, giving you modern encryption standards
- Browser-level considerations: While the extension secures traffic within Chrome, consider using it alongside the Mullvad app for full-system protection on devices with sensitive data
- WebRTC and DNS leakage: Keep an eye on WebRTC settings in Chrome and enable the extension’s DNS protection features to reduce leaks
Practical takeaway: the extension is a powerful convenience tool, but it shines brightest when used as part of a holistic Mullvad setup app + extension on a device you trust.
Performance and reliability in browser contexts
- Browsing stability: Expect solid stability for typical web use, streaming, and online work in Chrome
- Speed: VPNs inevitably add some overhead. with Mullvad’s WireGuard-based setup, you’ll generally see minimal impact on page loads and streaming quality
- Server choice: Proximity matters. choose a nearby server for faster browsing, or a location closer to your content if you’re doing region-locked streaming
- DNS and leak protection: Built-in protections reduce the risk of DNS leaks, keeping your browser traffic better shielded
- Battery and CPU: The extension is lightweight, but if you’re on a laptop, monitor battery impact during long sessions
Real-world usage note: if you notice slower speeds, try switching to a different server location or temporarily disabling other extensions that might interfere with VPN routing.
Mullvad Chrome extension vs native Mullvad app: which should you use?
- Extension advantages:
- Quick access and one-click protection from your browser
- Ideal for light to moderate browsing and quick privacy boosts
- Fewer steps to toggle protection when you’re already in Chrome
- Native app advantages:
- System-wide protection across all apps and browsers
- More granular controls kill switch behavior, multiple concurrent connections, network routing rules
- Better for devices where you want blanket protection, not just browser traffic
Bottom line: If your goal is browser-focused protection and convenience, the Mullvad Chrome extension is great. If you need total device-wide protection, rely on the Mullvad desktop or mobile apps in addition to the extension.
Common issues and troubleshooting
- Extension not appearing in Chrome: Ensure the app is installed and running. refresh the extension list. reinstall the extension
- No server list shows: Check your Mullvad account status. re-link the extension to your account. restart Chrome
- Connection drops or VPN not staying connected: Ensure the Mullvad app is running. review kill switch settings. check for conflicting VPNs or firewall rules
- DNS leaks: Confirm DNS protection is enabled in the extension and test using a DNS leak test site
- WebRTC leaks: Disable WebRTC in Chrome’s settings or use privacy-focused flags to minimize leaks
- Slow speeds: Try a nearby server. switch protocols if available. ensure no bandwidth-heavy background tasks are active
- Inconsistent IP after reconnect: Clear browser cache, re-check your IP, and reconnect to a different server if needed
Browser compatibility and alternatives
- Chrome-focused browsing: The Mullvad extension is designed for Chrome. if you use Firefox, Edge, or other browsers, check Mullvad’s official guidance for compatible extensions or use the desktop app for browser-agnostic protection
- Alternatives: Other providers offer Chrome extensions with various levels of control. If you like being able to toggle quickly within the browser and need advanced features, compare with options like NordVPN, ExpressVPN, or Surfshark in terms of server network, kill switch reliability, and privacy posture
- Cross-platform consistency: If you’re using multiple devices laptop, phone, tablet, rely on Mullvad’s cross-device accounts to keep a consistent privacy setup across your ecosystem
Pricing, value, and how to pay
- Mullvad follows a simple pricing model focused on a straightforward monthly or annual rate, with a focus on anonymity and privacy
- Anonymous payments: Mullvad accepts cash payments via mail, Bitcoin, and other privacy-friendly methods
- No long-term commitments: You can try the service with a month-to-month approach and scale up as needed
- Extensions and apps are typically included with the service, meaning you don’t pay extra specifically for browser extensions. they’re part of the overall Mullvad experience
Pricing considerations:
- If you’re price-conscious, compare with other providers’ Chrome extensions and browser protections, but weigh Mullvad’s privacy-first approach, transparency, and ease of use
Practical tips for safer Chrome browsing with Mullvad
- Enable the extension as soon as you connect to a sensitive network coffee shop Wi-Fi, airports, etc.
- Use the kill switch and DNS protection features to minimize exposure if your connection flaps
- Regularly update Chrome, the Mullvad extension, and the Mullvad app to shore up security
- Use a separate browser profile for browsing with the VPN extension to minimize cross-site data leakage
- Combine with strong, unique passwords and two-factor authentication for any Mullvad-related accounts
- Consider additional privacy tools like tracker-blocking extensions in conjunction with Mullvad for layered protection
FAQs
Frequently Asked Questions
# What is the Mullvad vpn chrome extension?
The Mullvad vpn chrome extension is a browser-based control that lets you interact with Mullvad’s VPN service from inside Chrome, enabling quick connection, server selection, and basic security features for browser traffic.
# How do I install the Mullvad vpn chrome extension?
Install the Mullvad app first, then add the Mullvad extension from the Chrome Web Store. Link the extension to your Mullvad account, choose a server, and connect.
# Does Mullvad chrome extension require the Mullvad desktop app?
In many cases, the extension works best when the Mullvad desktop app is installed and running, as it relies on the core service to route traffic.
# Is Mullvad chrome extension safe to use?
Yes, when you use the official Mullvad extension from Mullvad’s ecosystem and keep the app updated, it aligns with Mullvad’s privacy-first approach.
# Can I use the Mullvad chrome extension without paying for a plan?
No. You need an active Mullvad account to use the extension, just like with the desktop or mobile apps.
# Does the Mullvad chrome extension have a kill switch?
Yes, the extension supports kill-switch-like behavior in many configurations, preventing traffic if the VPN drops.
# Will Mullvad chrome extension protect against DNS leaks?
Yes, DNS leak protection is part of the extension’s core features to help keep DNS requests private.
# How can I verify that Mullvad is protecting my traffic in Chrome?
Visit an IP test site like ipinfo.io or ipconfig.me after connecting. your IP should reflect the Mullvad server location.
# Can I use Mullvad chrome extension on Windows, macOS, and Linux?
Yes, Mullvad provides cross-platform support, and the extension works across Chrome on these operating systems, often in conjunction with the Mullvad desktop client.
# How does Mullvad compare to other VPNs’ Chrome extensions?
Mullvad is known for privacy-first design, transparent policies, and anonymous payment options. Other providers may offer more features in their extensions, but Mullvad emphasizes a minimal, trustworthy approach without unnecessary data collection.
# Is Mullvad chrome extension free to use?
The extension is part of the Mullvad service. You pay for Mullvad VPN access, and the extension is a tool that accompanies the service.
# Can I run multiple devices with Mullvad at the same time using the Chrome extension?
You can use Mullvad on different devices, but simultaneous connections depend on your account’s terms and the overall Mullvad plan you’ve chosen.
# What should I do if the Mullvad extension won’t connect?
First, ensure the Mullvad app is running, then re-link the extension to your account, restart Chrome, and test a different server location. If problems persist, check firewall settings and extensions that might conflict with VPN traffic.
# Is a Mullvad Chrome extension a good option for streaming?
Yes, for browser-based streaming, Mullvad’s extension can help mask your location and provide a private browser session. For platform-wide streaming protection, also use the Mullvad desktop app.
# How do I disable the Mullvad Chrome extension safely?
Click the extension icon, select Disconnect, and remove or disable the extension from Chrome’s extensions settings when you don’t need VPN protection in the browser.
If you found this guide helpful, you’ll find the Mullvad Chrome extension to be a solid choice for Chrome-centric privacy with a straightforward approach. Remember, the strongest privacy comes from a layered approach: use the extension for browser traffic, run the full Mullvad app for device-wide protection, and stay mindful of settings like WebRTC leakage in Chrome.
纵腾网络 VPN 使用指南与评测